引言
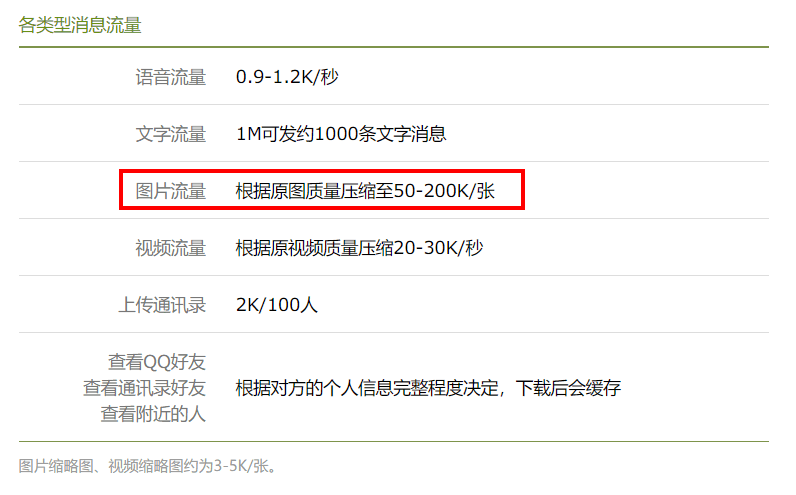
目前手机摄像头像素越来越高,拍个照动不动就 5-10 M,图片体积过大导致程序很可能直接 OOM,所以压缩和加载大图片要特殊处理。微信官方有一条关于图片流量的数据,根据原图质量压缩至50-200K/张 。朋友圈的图片是强制压缩,我们只能给朋友发照片的时候选择发送原图。
为什么会 OOM
- 通常情况下,移动设备的内存资源是有限的,Android 系统会根据手机的屏幕大小和密度,为每个程序设置一个最大内存限制,应用程序消耗的内存不能超过这个最大内存限制,否则就会出现 OOM 现象。当然,这个内存限制是跟手机配置相关联的,可以通过
ActivityManager.getLargeMemoryClass读取 - 图片的操作会消耗大量的内存,特别是细节丰富的图片,例如照片。以 Galaxy Nexus 相机为例子,它拍摄一张 2592x1936 像素的照片,如果使用的位图配置是 ARGB_8888 (默认从 Android 2.3 开始),那么这张照片加载到内存,大约会消耗 19MB 的内存(2592 x 1936 x 4字节),仅仅是图片消耗内存的数值可能已经超过了某些设备的内存限制
- Android 的 UI 经常会一次加载多张图片,例如,ListView、GridView、ViewPager 等等
压缩图片
首先,在 Android 设备中,图片有如下三种存在形式:
- 在硬盘上时,图片展现的方式是 File
- 在网络传输时,图片展现的方式是 Stream
- 在内存中,图片展现的方式是 Stream 或 Bitmap
因此,我们既要压缩图片 File 大小(减轻服务器存储压力),又要压缩图片 Pixel(避免 OOM)
Android 中有两种压缩图片的方法:
质量压缩(不改变图片的尺寸)
质量压缩一般可用于上传大图前的处理,这样就可以节省一定的流量。
所谓的质量压缩,它其实只能实现对 File 的影响。
缺点:照片失真、耗时尺寸压缩(相当于是像素上的压缩)
尺寸压缩一般可用于生成缩略图
通过缩放图片像素来减少图片占用内存大小
那么问题来了,拿到一张超大图片是先进行质量压缩,还是尺寸压缩呢?
质量压缩
Bitmap.compress(CompressFormat format, int quality, OutputStream stream)
这个方法有三个参数,是布尔类型的返回值
- CompressFormat 指定的 Bitmap 被压缩成的图片格式,只支持 JPEG,PNG,WEBP 三种
- quality 图片压缩质量的控制,范围为 0~100,0 表示压缩后体积最小,但是质量也是最差,100 表示压缩后体积最大,但是质量也是最好的(个人认为相当于未压缩,注意某些特殊情况压缩后体积反而增大),有些格式,例如 PNG,它是无损的,所以会忽略这个值。
- OutputStream 压缩后的数据会写入这个字节流中
- 返回值表示返回的字节流是否可以使用
BitmapFactory.decodeStream()解码成 Bitmap,至于返回值是怎么得到的,因为是 Native 的代码,没法找到逻辑。
压缩过程如下,通过依次减少图片质量,将图片大小控制在限制值范围内
/** |
小结,质量压缩通过不断较少 quality 来限制文件大小,假如图片特别大,当执行ByteArrayOutputStream.toByteArray() 这行时很可能 OOM,消耗的内存超过最大内存限制,所以质量压缩不能先执行。

尺寸压缩
Android 中的 BitmapFactory 类提供了一些解码方法,decodeByteArray()、decodeFile()、decodeResource()等等,根据不通的图片源选择不同的解码方法加载图片创建出 Bitmap。这些方法中都会传入一个BitmapFactory.Options 实例化对象,通过这个对象,可以更改一些加载图片的设置。由于这些解码方法用于解码加载图片,会占用内存构建 Bitmap,因此很容易导致 OOM 的异常。
如果将 options.inJustDecodeBounds 设置为 true,在解码过程中就不会申请内存去创建 Bitmap,返回的是一个空的 Bitmap,但是可以获取图片的一些属性,例如图片宽高,图片类型等等。
BitmapFactory.Options options = new BitmapFactory.Options(); |
我们知道图片的大小之后,就可以决定是否将完整的图片加载到内存或者加载压缩版的图片到内存。可以基于以下几点做出决定:
- 估计完整图片加载到内存中所使用内存
- 可分配给加载图片的内存
- 用于显示图片的控件的大小
- 当前设备的屏幕大小和密度
例如,如果显示图片的控件大小为 128x96 像素,就没有必要将一个 1024x768 像素的图片加载到内存中。
设置options.inSampleSize的数值,来控制压缩图片程度。例如,将options.inSampleSize设置为 4,将一个 2048x1536 像素的图片解码加载到内存后产生的 Bitmap 大约为 512x384 像素,如果使用的位图配置是ARGB_8888,那么仅仅需要 0.75M(512 384 4 / 1024 / 1024) 就加载了缩小版的图片到内存,而加载完整的图片需要 12M(2048 1536 4 / 1024 / 1024)。
也就是说,如果我们设置inSampleSize == 2,解码出来的位图的宽高是原图的 1/2,图片所占用内存缩小了1/4(1/2 * 1/2)。如果inSampleSize设置的值小于等1,都会当做inSampleSize == 1来解码加载图片。
于是我们可以在加载图片的时候,根据控件的大小(显示到屏幕上的大小)来计算出压缩版图片的inSampleSize值。计算恰当的inSampleSize是尺寸压缩最重要的参数,网上有很多种算法,这里罗列几种
Android 源码计算方式
public static int computeSizeByAndroid(BitmapFactory.Options options, int minSideLength, int maxNumOfPixels) {

        int initialSize = computeInitialSampleSize(options, minSideLength,   maxNumOfPixels);

        int roundedSize;

        if (initialSize <= 8) {
            roundedSize = 1;
            while (roundedSize < initialSize) {
                roundedSize <<= 1;
            }
        } else {
            roundedSize = (initialSize + 7) / 8 * 8;
        }

        return roundedSize;
    }


    private  static int computeInitialSampleSize(BitmapFactory.Options options, int minSideLength, int maxNumOfPixels) {

        double w = options.outWidth;
        double h = options.outHeight;

        int lowerBound = (maxNumOfPixels == -1) ? 1 :
        (int) Math.ceil(Math.sqrt(w * h / maxNumOfPixels));

        int upperBound = (minSideLength == -1) ? 128 : (int) Math.min(Math.floor(w / minSideLength), Math.floor(h / minSideLength));

        if (upperBound < lowerBound) {
            // return the larger one when there is no overlapping zone.
            return lowerBound;
        }

        if ((maxNumOfPixels == -1) && (minSideLength == -1)) {
            return 1;
        } else if (minSideLength == -1) {
            return lowerBound;
        } else {
            return upperBound;
        }
    }
使用方法如下,其中 tagWidth 和 tagHeight 为压缩后的长宽
BitmapFactory.Options options = new BitmapFactory.Options();
options.inJustDecodeBounds = true;
options.inSampleSize = computeSampleSize(options, -1, tagWidth * tagHeight);
常规算法
public static int computeSize(int srcWidth, int srcHeight, int tagWidth, int tagHeight) {
    int sampleSize = 1;
    if (srcHeight > tagHeight && srcWidth > tagWidth) {
      sampleSize = srcWidth / tagWidth;
    } else if (srcHeight < tagHeight && srcWidth > tagWidth) {
      sampleSize = srcHeight / tagHeight;
    }
    return sampleSize;
  }
其中,srcWidth 和 srcHeight 为原图片大小,tagWidth 和 tagHeight 为压缩后的长宽
鲁班算法,据说接近微信压缩算法
public static int computeSizeByLuban(int srcWidth, int srcHeight) {
    int sampleSize;
    srcWidth = srcWidth % 2 == 1 ? srcWidth + 1 : srcWidth;
    srcHeight = srcHeight % 2 == 1 ? srcHeight + 1 : srcHeight;
    srcWidth = srcWidth > srcHeight ? srcHeight : srcWidth;
    srcHeight = srcWidth > srcHeight ? srcWidth : srcHeight;
    double scale = ((double) srcWidth / srcHeight);
    if (scale <= 1 && scale > 0.5625) {
      if (srcHeight < 1664) {
        sampleSize = 1;
      } else if (srcHeight >= 1664 && srcHeight < 4990) {
        sampleSize = 2;
      } else if (srcHeight >= 4990 && srcHeight < 10240) {
        sampleSize = 4;
      } else {
        sampleSize = srcHeight / 1280 == 0 ? 1 : srcHeight / 1280;
      }
    } else if (scale <= 0.5625 && scale > 0.5) {
      sampleSize = srcHeight / 1280 == 0 ? 1 : srcHeight / 1280;
    } else {
      sampleSize = (int) Math.ceil(srcHeight / (1280.0 / scale));
    }
    return sampleSize;
  }
OK,得到 inSampleSize 值后,就可以根据这个值来加载压缩版的图片了
public static Bitmap decodeSampledBitmapFromResource(Resources res, int resId, |
小结,尺寸压缩的首先要获取原图的长宽值,设置options.inJustDecodeBounds = true仅获取 Bitmap 基本信息,接着计算 inSampleSize 值,最后通过 BitmapFactory 解码完成
执行顺序
回到上面那个问题,拿到一张超大图片是先进行质量压缩,还是尺寸压缩呢?
答案是先尺寸压缩,后质量压缩,因为尺寸压缩可以设置options.inJustDecodeBounds = true仅获取 Bitmap 基本信息,几乎不占用应用程序的运行内存,最终代码如下
/** |
小结,压缩图片主要分为质量压缩和尺寸压缩,质量压缩用于减少 File 文件的体积大小,尺寸压缩用于生成缩略图,降低像素来减少图片占用内存大小(后面会讲到拒绝压缩像素加载高清图)。
加载图片
首先要知道 Bitmap 所占内存大小计算方式:
图片长度 x 图片宽度 x 一个像素点占用的字节数
图片的长宽我们在上面已经讲到通过尺寸压缩的方式来降低,那么接下来就如何改变一个像素点占用的字节数
降低像素点字节
在 Bitmap 中有一个 Config 的属性,这个属性是用来描述每个像素被储存的大小。目前常用的 Config 有四个值:ALPHA_8、RGB_565、ARGB_4444、ARGB_8888。
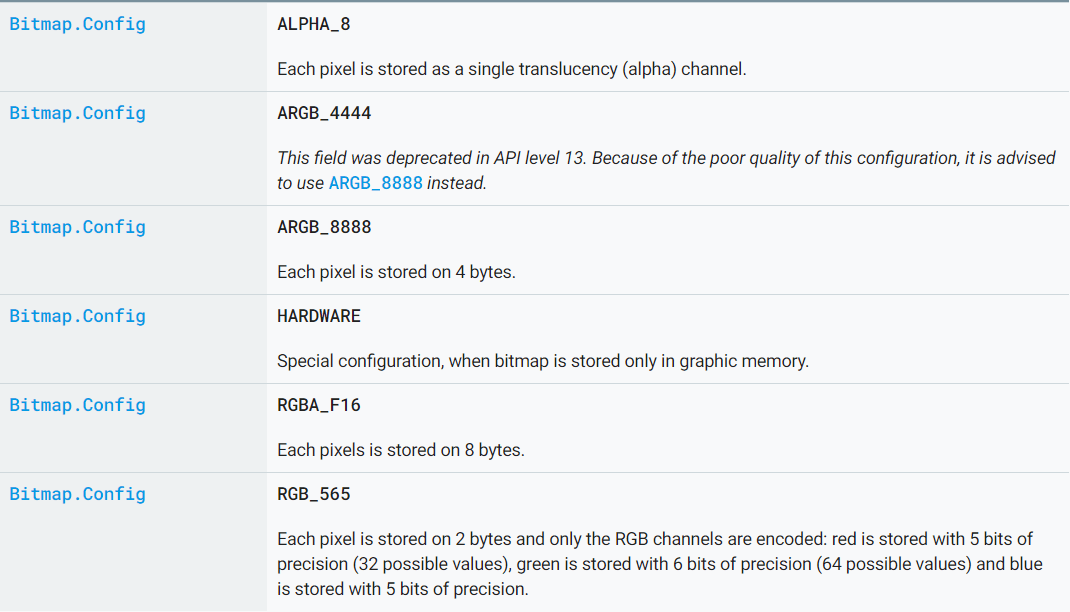
其中,A 代表透明度;R 代表红色;G 代表绿色;B 代表蓝色。
ALPHA_8
表示 8 位 Alpha 位图,即 A=8,一个像素点占用 1 个字节,它没有颜色,只有透明度
ARGB_4444
表示 16 位 ARGB 位图,即 A=4,R=4,G=4,B=4,一个像素点占 4+4+4+4=16 位,2 个字节ARGB_8888
表示 32 位 ARGB 位图,即 A=8,R=8,G=8,B=8,一个像素点占 8+8+8+8=32 位,4 个字节RGB_565
表示 16 位 RGB 位图,即 R=5,G=6,B=5,它没有透明度,一个像素点占 5+6+5=16 位,2个字节
有什么区别呢?最简单的,当一个颜色表现形式越多,那么画面整体的色彩就会更丰富,图片质量就会越高,当然,图片占用的储存空间也越大。Android 默认采用 ARGB_8888 ,那么我们在加载图片的时候使用 RGB_565 就能降低一半图片占用内存
BitmapFactory.Options options = new BitmapFactory.Options(); |
局部加载
对于图片加载还有种情况,就是单个图片非常巨大,并且还不允许压缩。比如显示:世界地图、清明上河图、微博长图等。
那么对于这种需求,该如何做呢?
首先不压缩,按照原图尺寸加载,那么屏幕肯定是不够大的,并且考虑到内存的情况,不可能一次性整图加载到内存中,所以肯定是局部加载,那么就需要用到一个类:BitmapRegionDecoder
至于 BitmapRegionDecoder 是啥,本文不打算讲,感兴趣的去看看鸿洋的文章
这里我直接推荐 2个 开源库,拿来就用
- https://github.com/LuckyJayce/LargeImage
- https://github.com/davemorrissey/subsampling-scale-image-view
具体用法看看 example ,本文也不打算讲
最后
图片的处理,时刻都需要注意,因为机型配置的不同,以及现场设备内存使用的情况,都有可能导致 OOM 的现象,上述提到了压缩方法,基本适用与大部分图片压缩情况。当然如果对图片画质显示有要求,使用局部加载方法。
参考:
https://developer.android.com/reference/android/graphics/Bitmap
https://www.jianshu.com/p/0f56f35068e2
https://blog.csdn.net/HarryWeasley/article/details/51955467
https://blog.csdn.net/lmj623565791/article/details/49300989
https://github.com/LuckyJayce/LargeImage
https://github.com/davemorrissey/subsampling-scale-image-view
